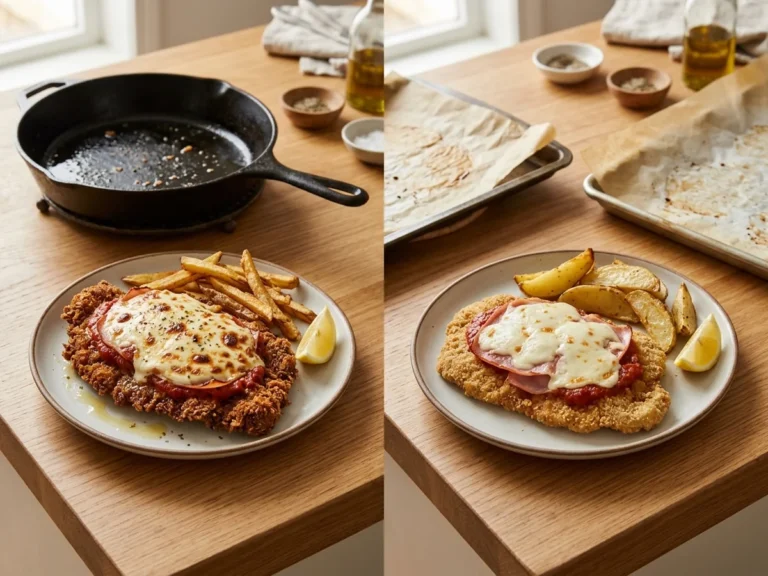
How to Dredge and Bread Milanesa for Maximum Crunch
Introduction
To achieve a perfectly crispy texture, you learn how to bread milanesa by creating a structured three-step dredging process that ensures every inch of meat is evenly coated. Mastering how to bread milanesa requires careful attention to the moisture levels of the meat and the pressure applied during the final coating stage.
This guide covers the essential techniques for preparing your protein, from using a meat mallet for uniform thickness to selecting the right ingredients for a durable crust. You will discover the traditional milanesa coating method, including how to make milanesa breading stick reliably during the frying process. We also explore the best breadcrumbs for milanesa and specific preparation tips to ensure your meal turns out golden and crunchy every time. By following these steps, you can confidently produce professional-quality results in your own kitchen.
How to Prepare Milanesa Meat
Creating a golden, crispy crust starts with uniform meat preparation. You achieve the best results by pounding your cut of meat, such as top round steak, to an even thickness using a meat mallet. This consistency ensures the steak cooks through at the same rate as the exterior, preventing soggy spots.
Efficiently applying your layers requires a clean, organized workspace. By setting up a standard station, you can maintain a steady flow and keep your fingers relatively tidy throughout the process. Following these fundamental milanesa preparation tips helps you avoid common pitfalls like uneven coating or breading that falls off during frying:
- Keep your meat dry before applying the flour.
- Use a shallow dish for the egg wash to submerge steaks completely.
- Press your crumbs firmly into the surface to ensure they hold.
Preparing Meat for Breading
Start by selecting a lean, tender cut such as top round steak, which is ideal for quick, even cooking. This cut responds well to thinning, ensuring your finished dish has the perfect texture without becoming tough or chewy.
Use a meat mallet to pound the beef into a uniform thickness. This step is essential for milanesa preparation tips because it guarantees that the entire piece cooks at the same rate, preventing parts from drying out while others remain raw.
To manage the mess during the coating process, lay out a large sheet of parchment paper on your workspace. Placing your workstation on this surface makes cleanup effortless and keeps your counters tidy while you work through the flour, egg, and crumb stages.
Mastering the Breading Station

Creating a consistent, crunchy exterior requires a disciplined three-stage setup that ensures every inch of the meat is evenly coated. Using the traditional milanesa coating method prevents the breading from peeling away during the frying process, which is the most common challenge home cooks face.
- Arrange three shallow bowls in a row, filling them respectively with all-purpose flour, a well-beaten egg wash, and your chosen breadcrumbs.
- Dredge the meat lightly in flour, shaking off any excess to provide a dry base for the subsequent layers.
- Dip the floured piece into the egg wash, ensuring complete coverage so the breadcrumbs have a tacky surface to cling to.
- Press the meat firmly into the breadcrumbs, using the palm of your hand to create a tight, uniform seal that stays intact during frying.
Selecting Your Breading Ingredients
The best breadcrumbs for milanesa depend on your desired texture, with fine crumbs offering a classic, dense crunch and panko breadcrumbs creating a lighter, shaggier finish. Many home cooks prefer a blend of both to balance consistency and crispness.
Fine breadcrumbs adhere snugly to the meat, ensuring an even coating that stays intact during frying. In contrast, panko breadcrumbs contain larger, airier flakes that absorb less oil and provide a distinctively shattered, crunchy bite. Choosing between them changes the overall mouthfeel of your dish.
For maximum flavor, season each layer of your station. Stir salt, pepper, and dried herbs directly into your all-purpose flour and breadcrumb mixtures. This approach guarantees that every component of the breading adds depth, preventing a bland crust that detracts from the savory steak inside.
Ensuring the Breading Sticks

You ensure a secure coating by pressing the breadcrumbs firmly into the meat surface and allowing the prepared steaks to rest before cooking. This simple step helps the traditional milanesa coating method bond effectively, preventing the crust from detaching during the fry.
- Use a meat mallet to flatten the top round steak to an even thickness, which provides a consistent surface for the breading to grip.
- Press the breadcrumbs into the egg-washed meat with the palm of your hand to create a tight, uniform seal across the entire cut.
- Place the breaded pieces on a tray and refrigerate for at least twenty minutes to allow the moisture to set and the coating to firm up.
- Avoid overcrowding the skillet during frying, as this drops the oil temperature and can cause the breading to pull away from the beef.
Frying for Perfect Texture

Achieving a crispy finish requires maintaining a steady medium-high heat with a neutral oil that has a high smoke point. If the oil is too cool, the coating will absorb excess fat rather than crisping, while overheating causes the breadcrumbs to burn before the meat is cooked through. Adjust your burner as needed throughout the process to keep the temperature consistent.
Avoid overcrowding the skillet, as adding too many pieces at once drops the oil temperature rapidly and leads to soggy results. Fry your cutlets in small batches to ensure each piece has enough space for the hot oil to circulate, promoting even browning on all sides.
- Place fried cutlets on a wire rack set over a baking sheet to drain excess oil.
- Use paper towels only as a secondary measure to prevent steaming.
Common Breading Mistakes

Achieving a perfectly crisp crust relies on avoiding moisture traps and managing your heat carefully throughout the cooking process. Even small errors when applying the breading layers can lead to soggy or uneven results.
- Pat the meat thoroughly dry with paper towels before starting, as excess surface moisture prevents the flour from adhering properly and creates a steamed, soggy layer.
- Apply flour in a thin, even dusting to avoid thick, doughy patches that fail to crisp up during frying.
- Maintain a steady, medium-high heat for your oil because low temperatures cause the breading to absorb grease rather than sealing into a crunchy exterior.
- Avoid overcrowding the pan, which drops the oil temperature and leads to greasy, limp results instead of a golden, crunchy finish.
FAQ
Why does my breading fall off during frying?
Breading typically detaches when the meat surface is too damp or the flour layer is applied too heavily. Ensure you pat the meat dry with paper towels before starting the process of coating your milanesa to help the egg wash adhere properly.
What are the best breadcrumbs for milanesa?
Fine, dry breadcrumbs are the standard choice for a classic, uniform crust that clings tightly to the meat. If you prefer a lighter, airier crunch, mixing in a portion of panko breadcrumbs can provide extra texture while still allowing the coating to stay intact.
Do I need to pound the meat before breading?
Using a meat mallet to pound the steak to an even, thin thickness is a critical step in milanesa preparation tips. This process ensures the meat cooks rapidly in the skillet, preventing the exterior from burning before the center is ready.
How can I make sure the coating is extra crunchy?
Pressing the breadcrumbs firmly into the meat with the palm of your hand is the most effective way to ensure a solid, crisp layer. Once coated, letting the milanesa rest for a few minutes before frying helps the breading hydrate slightly, which prevents it from shedding in the hot oil.
Can I use something other than all-purpose flour?
While all-purpose flour is the conventional base for the first stage of the dredging process, you can substitute it with cornstarch or other fine grain starches. These alternatives create a barrier that helps keep the meat juices contained, which is a useful trick for maintaining a crisp finish.
Conclusion
The final step in achieving a perfectly crisp result is ensuring the coating is firmly pressed onto the meat before it touches the hot oil. Once you have mastered how to bread milanesa, your next decision involves choosing between shallow frying for a traditional finish or pan searing for a lighter meal. Simply heat your neutral oil to the right temperature and fry until each side reaches a deep, golden brown color.
You might also like: Crispy Milanesa Recipe (Traditional Beef & Chicken Cutlets)